
This article will walk you through the steps required to setup your TrevNet Media hosted email account for IMAP access on your iPhone (iPad is very similar). This article assumes that you have already logged into your cPanel account and configured a mailbox.
Step 1
From the Home screen, tap the Settings icon.
Step 2
Scroll down the settings screen and tap the Mail item.

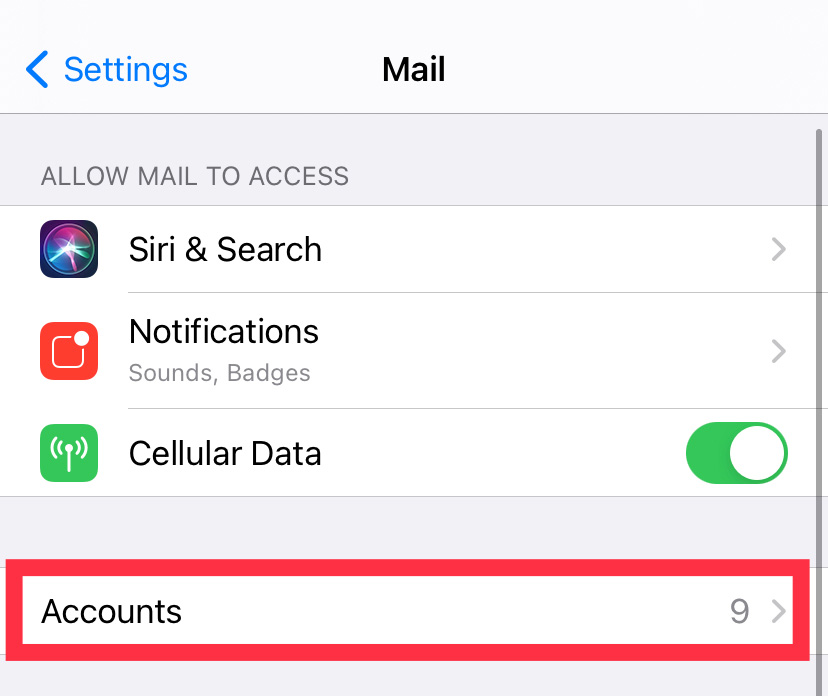
Step 3
Tap Accounts item.
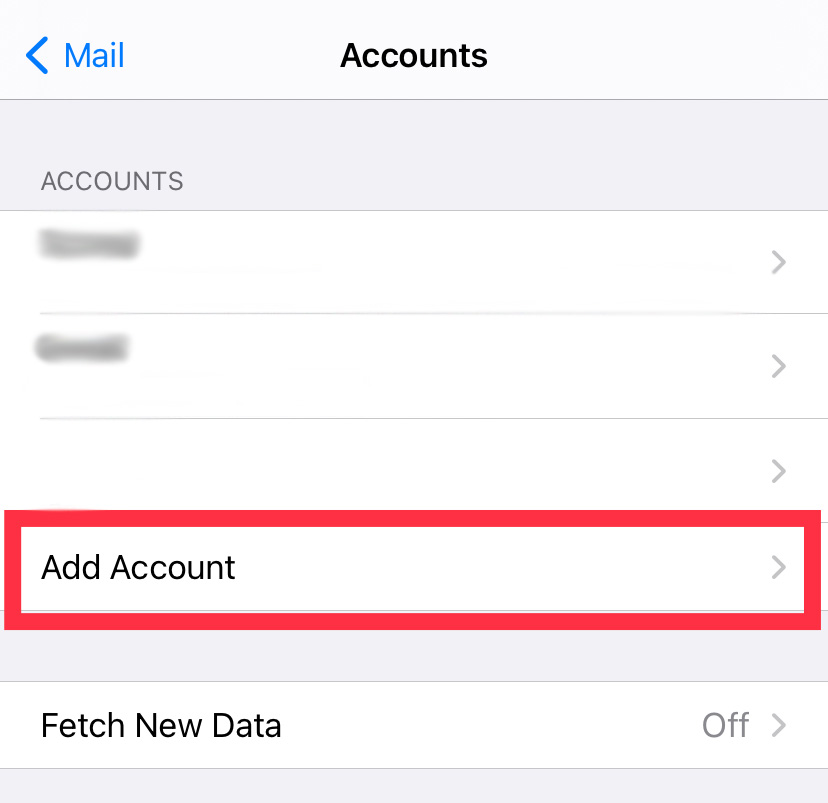
Step 4
Tap the Add Account... item.
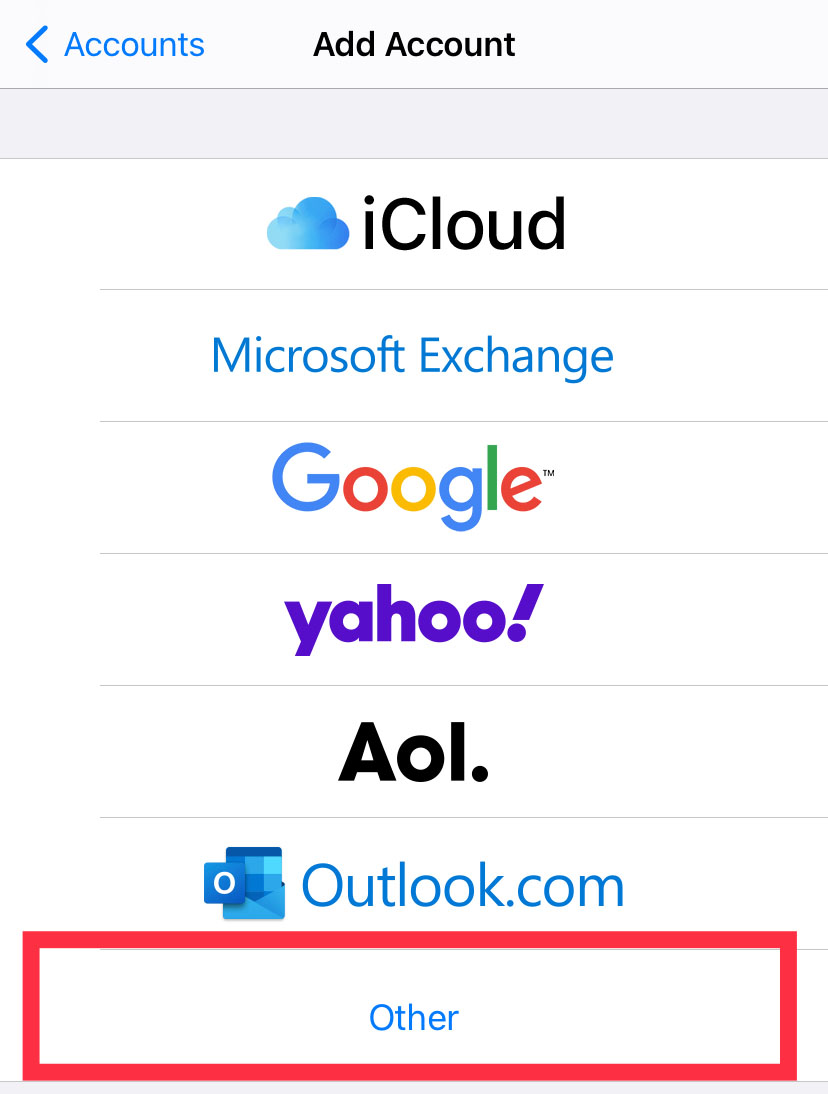
Step 5
Scroll down to the bottom of the account types, and tap Other.
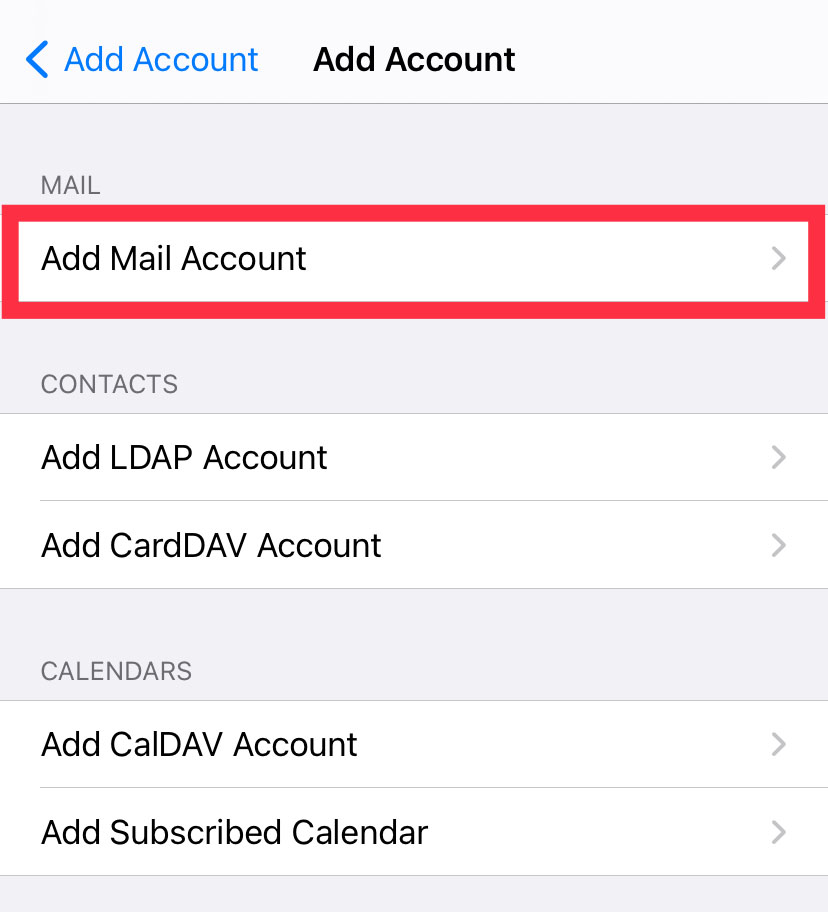
Step 6
Tap Add Mail Account.
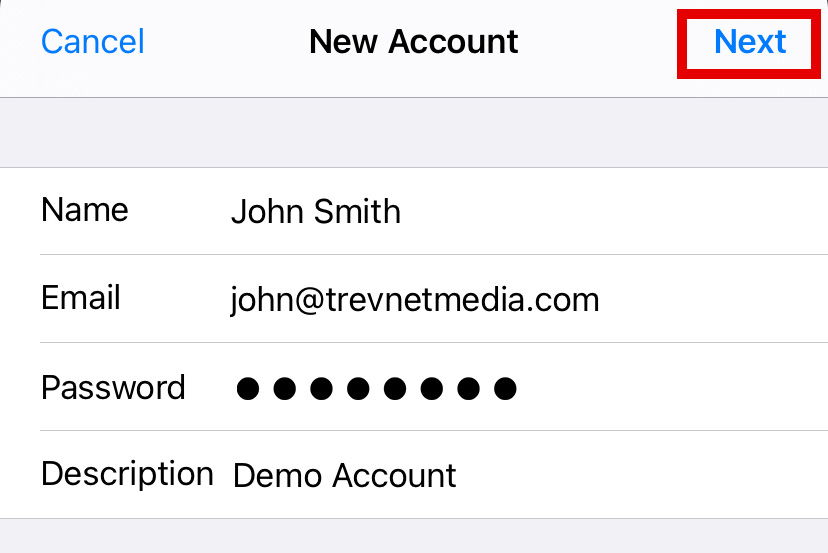
Step 7
Enter the initial account settings as follows:
- Name : Just enter a friendly name here that will identify you to your email recipients
- Email : This should be the full email address you configured earlier in cPanel
- Password : the mailbox password
- Description : Just a friendly name to label this account on your iDevice
When you are done, tap Next at the top right.
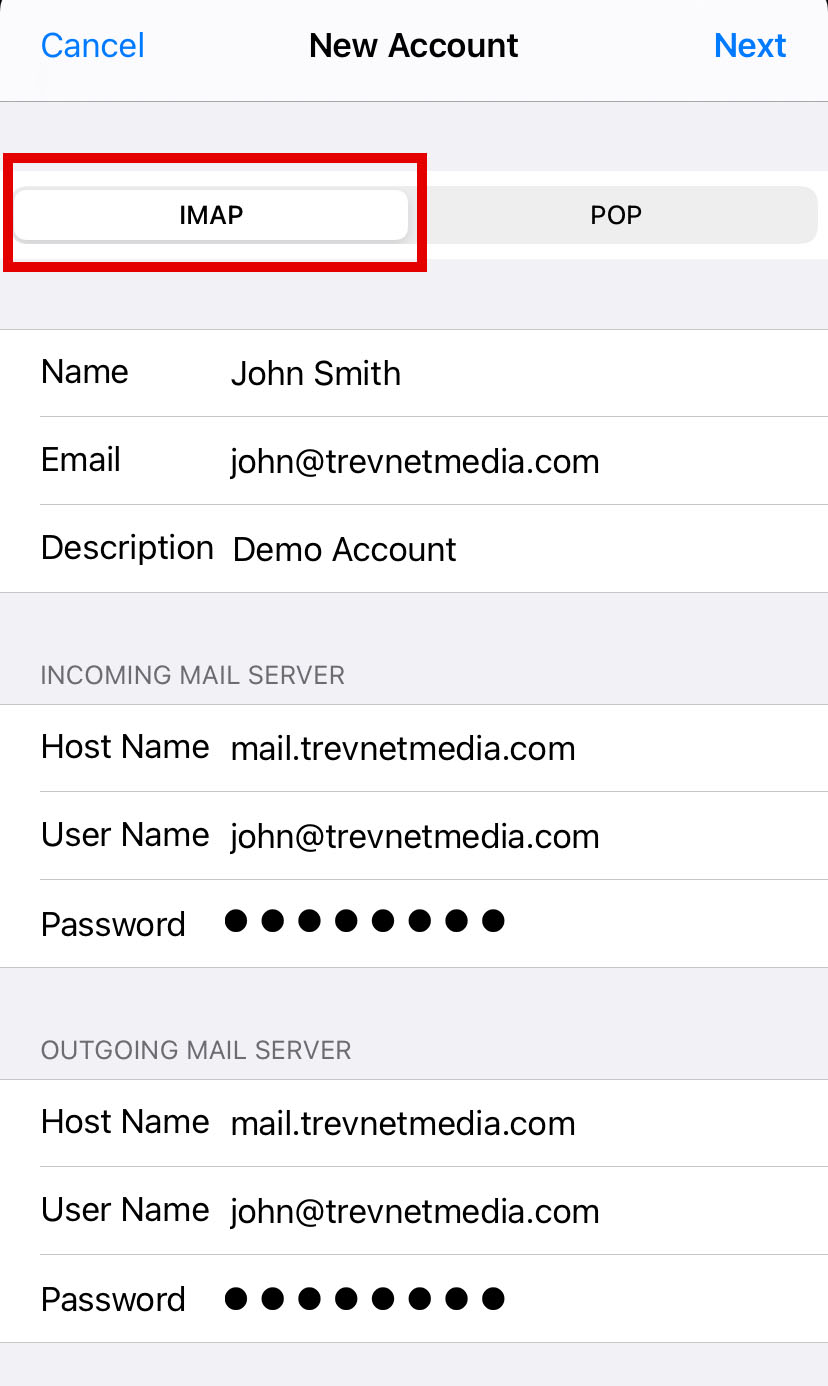
Step 8
- IMAP Should be selected by default - if not, then tap it.
- Name : Should be autocompleted with the friendly name you gave in the previous step.
- Email : Should be autocompleted with the full email address you gave in the previous step.
- Description : Should be autocompleted with the description you gave in the previous step.
Incoming Mail Server & Outgoing Mail Server
- Host Name : Enter your Home Server name here - this was given to you in your welcome email.
- User Name : Enter the full email address for the mailbox you configured in cPanel.
- Password : Enter the mailbox password.
When you are done, tap Next at the top right.
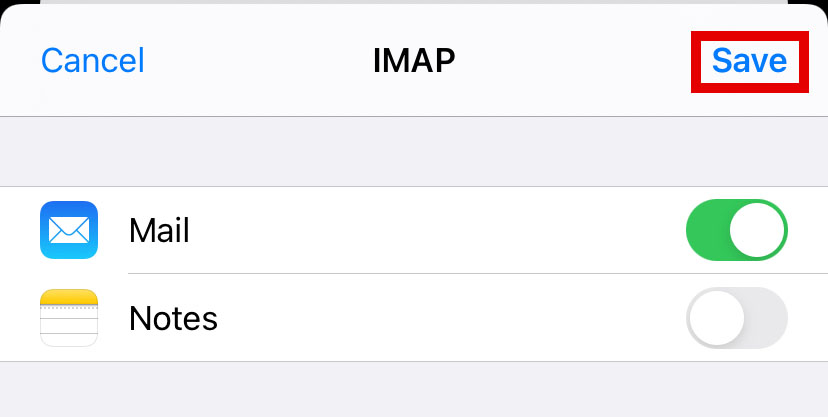
Step 9
- To activate this mailbox, make sure that Mail is On by swiping the toggle switch.
- If you do not wish to store Notes in this mailbox then swipe the Notes toggle to the Off position.
When you are done, tap Save.
Step 10
This will take you back to the list of accounts. We now need to ensure that sent items are stored on the server instead of only on your iOS device, otherwise you will not be able to access emails you have sent from this iOS device on other computers/devices. Tap the entry of the account you just created.
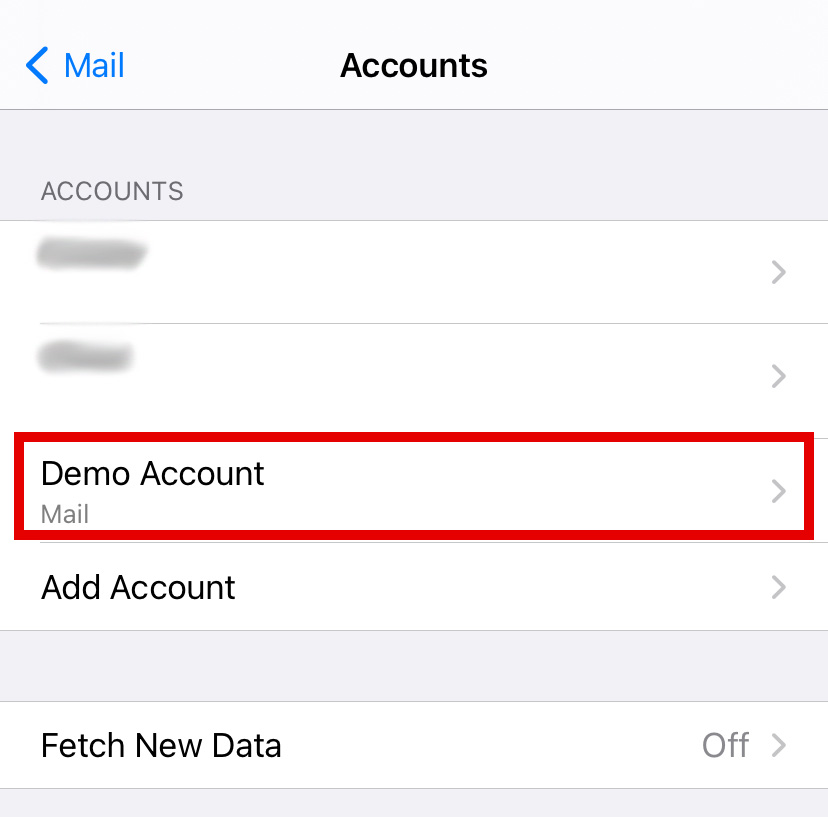
If you have lost your place, then go back to Step 1, 2 and 3 to arrive back at this screen. Tap the entry for the account you just created.
Step 11
On the account overview screen, tap the Account item.
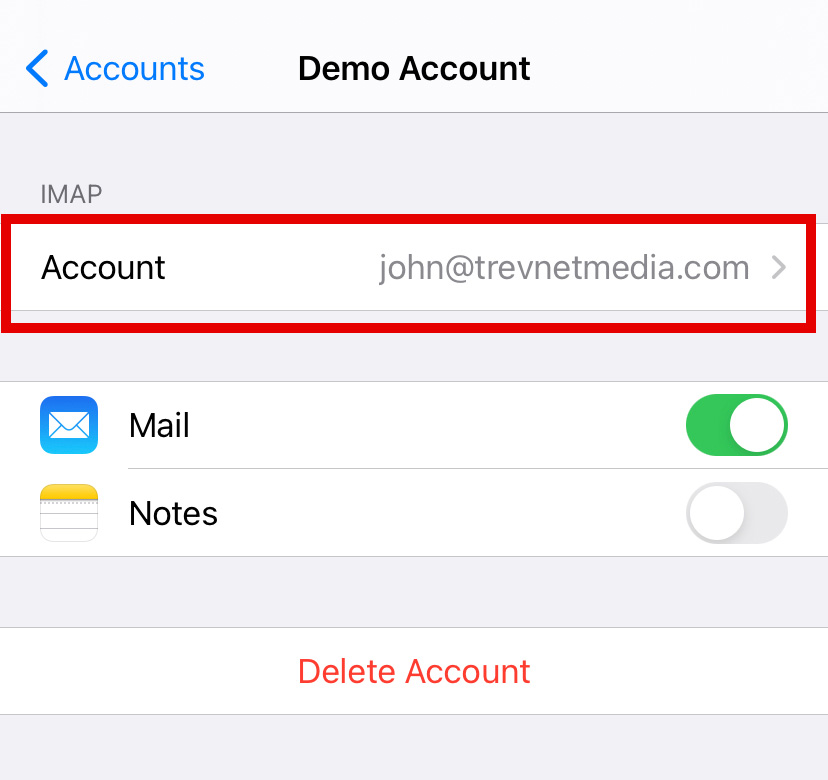
Step 12
Scroll to the bottom of the screen and tap the Advanced item.
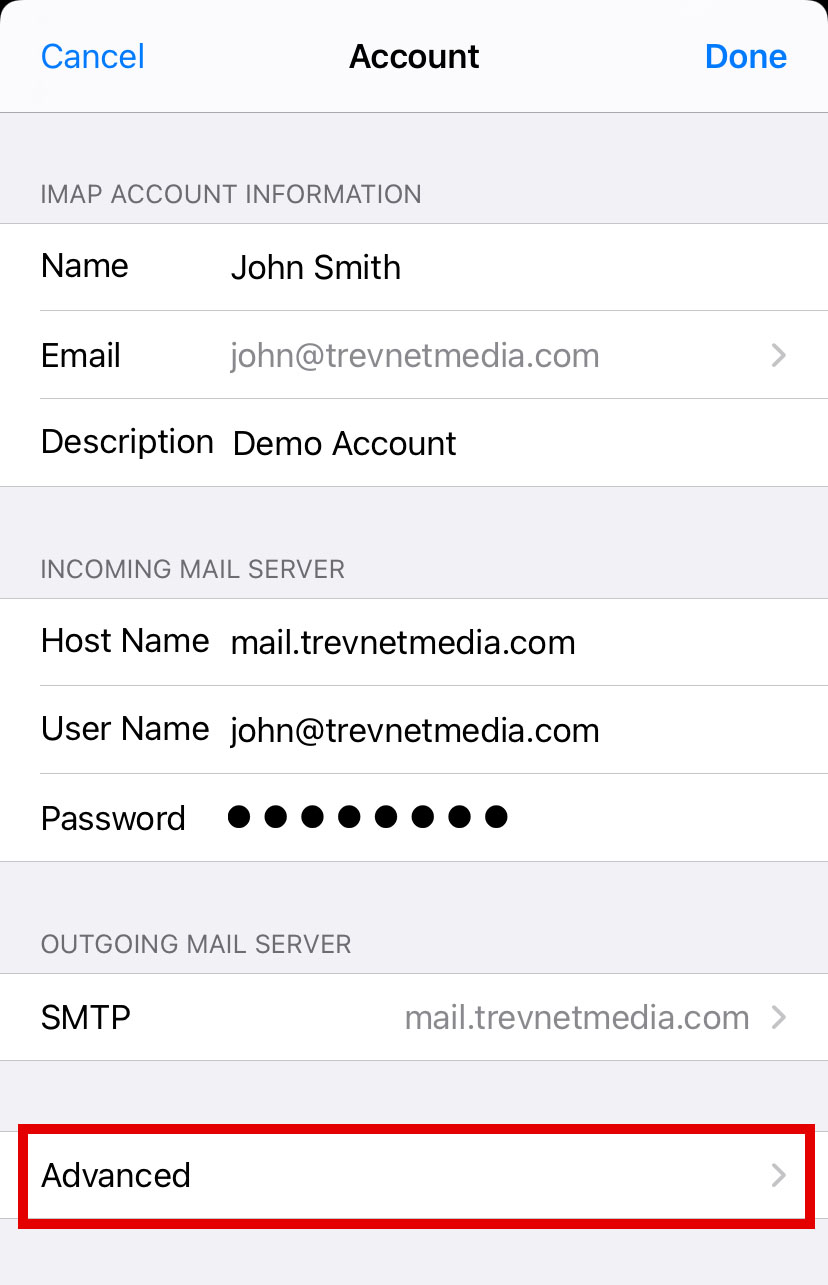
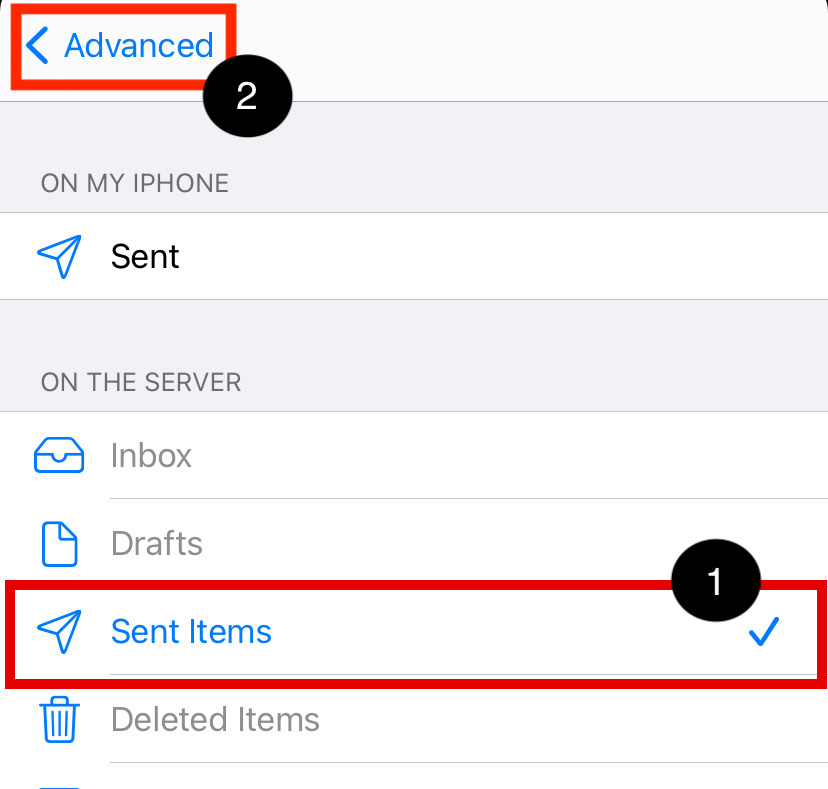
Step 13
On the Advanced screen, tap the Sent Mailbox item.
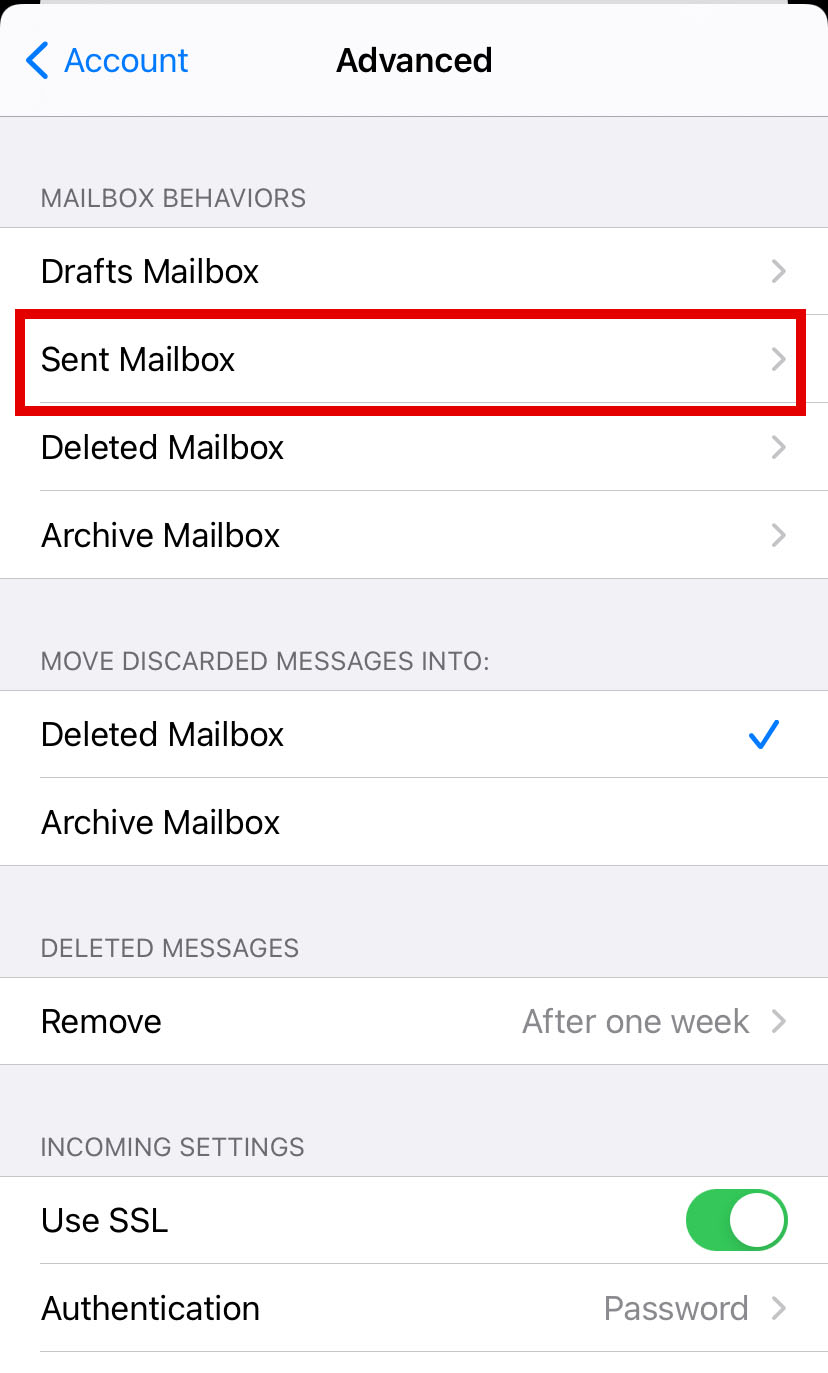
Step 14
- You will probably find that the Sent item On My iPhone is currently ticked. Tap on the Sent item under On the Server in order to save your sent items on the server instead. You can repeat steps 12 and 13 for the Drafts and Deleted items if you wish.
- When you are done - tap the Advanced button (top left) to return to the previous screen.
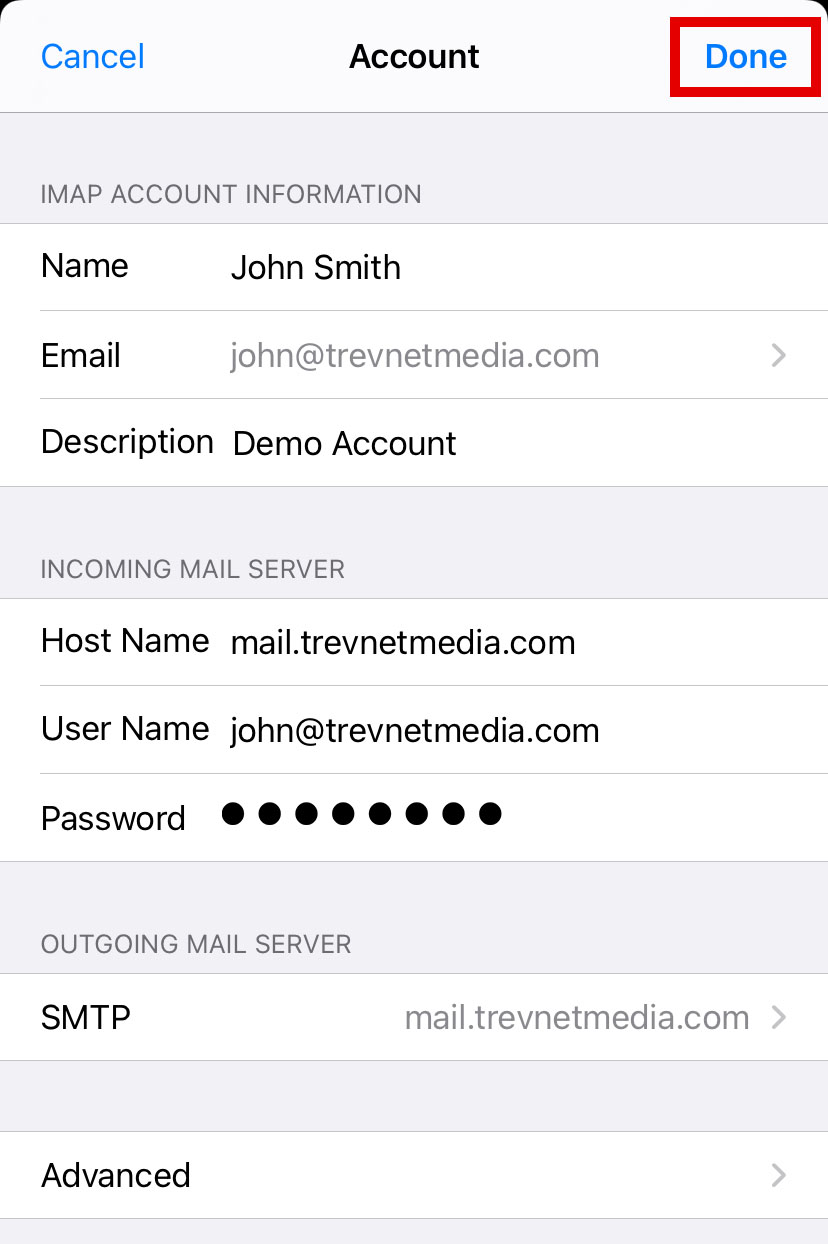
Step 15
You will now be back on the Advanced screen (as shown in Step 13). Tap the Account button (top left) to return to the Account screen.
Now, finally, from the Account screen, tap the Done button (top right) to save the changes you just made to your account. After that, you can just exit the settings altogether and start using your mailbox.
Should you require any further assistance please feel free to contact us anytime.
